Are you ready to step up your gaming experience? In this comprehensive guide, “Guide to Build Your Own Gaming PC,” we’ll walk you through the process of creating your dream gaming rig, tailored to your specific needs and preferences. From selecting the right components to assembling and optimizing your system, we’ve got you covered. Let’s dive in and unleash the power of PC gaming!
Table of Contents
Introduction
Welcome to the ultimate guide to building your own gaming PC! In this article, we’ll explore the step-by-step process of creating a powerful gaming rig that will take your gaming experience to new heights. By following this guide, you’ll have full control over the components, performance, and aesthetics of your system. Let’s embark on this exciting journey together!
Planning Your Gaming PC
Defining Your Gaming Goals
Before diving into the world of hardware, it’s essential to define your gaming goals. Ask yourself what type of games you’ll be playing, the desired resolution and frame rates, and any specific requirements for game genres or professional applications. Understanding your needs will help you make informed decisions during the component selection process.
Establishing a Budget
Setting a budget is crucial when building a gaming PC. It helps you prioritize your spending and ensures that you get the best value for your money. Consider how much you’re willing to invest in your system and allocate funds accordingly for each component. Remember to factor in additional costs such as peripherals, software, and potential future upgrades.
Researching Components
With your gaming goals and budget in mind, it’s time to start researching components. Look for reputable brands and read reviews to find the best options within your price range. Consider factors such as compatibility, performance benchmarks, and the features each component offers. Make a list of potential choices for each part of your gaming PC.
Selecting the Right Components
The Central Processing Unit (CPU)
The CPU is the brain of your gaming PC, responsible for executing instructions and handling calculations. Look for a CPU that matches your gaming needs and is compatible with your chosen motherboard. Consider factors such as the number of cores, clock speed, and cache size. Opt for a reputable brand known for delivering high performance and reliability.
Graphics Processing Unit (GPU)
The GPU is a critical component for gaming, as it handles the rendering of graphics and affects the visual quality and frame rates in games. Research different GPUs and choose one that meets the requirements of your favorite games. Look for options with sufficient VRAM, high clock speeds, and support for the latest technologies like ray tracing and DLSS.
Motherboard
The motherboard serves as the foundation for your gaming PC, connecting all the components together. Ensure compatibility between the motherboard and CPU socket type. Consider factors like the number of RAM slots, expansion slots for future upgrades, support for overclocking, and connectivity options. Look for a motherboard from a reputable manufacturer known for stability and durability.
Random Access Memory (RAM)
RAM plays a crucial role in gaming performance, as it stores data that the CPU can quickly access. Choose RAM modules with sufficient capacity and high clock speeds to ensure smooth gameplay and multitasking. Consider the DDR4 standard for its speed and availability. Aim for at least 8GB of RAM, but if your budget allows, opt for 16GB or more.
Storage Options
When it comes to storage, consider a combination of speed and capacity. Solid State Drives (SSDs) offer fast loading times and quick file transfers, while Hard Disk Drives (HDDs) provide ample storage at a lower cost. Consider an SSD for your operating system and frequently played games, and an HDD for mass storage. Aim for at least a 256GB SSD and 1TB HDD.
Power Supply Unit (PSU)
The PSU provides the necessary power to all the components in your gaming PC. Choose a PSU with sufficient wattage to support your system and potential future upgrades. Look for PSUs that are 80 Plus certified for energy efficiency and have adequate cable management options. Consider reputable brands known for their reliability and stable power delivery.
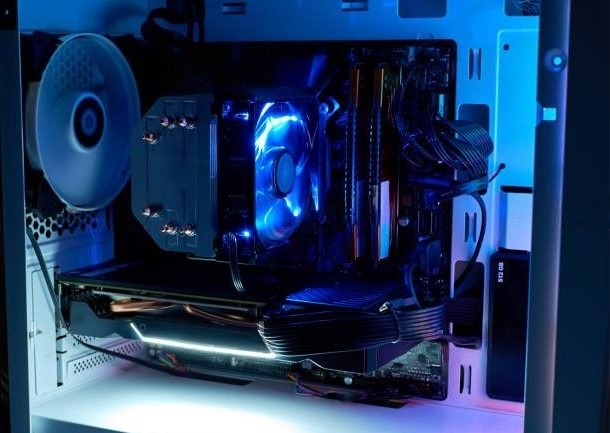
Cooling System
Proper cooling is essential to prevent overheating and maintain optimal performance. Consider both air and liquid cooling options. Air coolers are affordable and reliable, while liquid coolers offer better cooling efficiency but can be more expensive. Choose a cooling solution that fits your budget and the space available in your PC case.
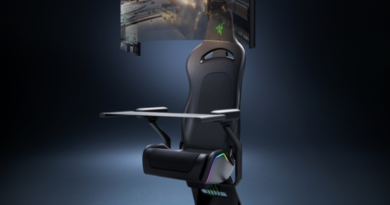
Peripherals and Accessories
Don’t forget about the peripherals and accessories that enhance your gaming experience. Choose a gaming keyboard, mouse, and headset that are comfortable and suited to your gaming style. Consider additional accessories like a gaming chair, mousepad, and RGB lighting to personalize your setup. Research and select peripherals that align with your preferences and budget.
Assembling Your Gaming PC
Preparing Your Workspace
Before you start assembling your gaming PC, ensure you have a clean and well-lit workspace. Gather all the necessary tools, such as screwdrivers and cable ties. Refer to the manuals provided with your components for specific instructions and precautions.
Installing the CPU and CPU Cooler
Carefully install the CPU into the motherboard’s CPU socket according to the manufacturer’s instructions. Apply thermal paste and attach the CPU cooler, ensuring it’s securely mounted. Connect the cooler’s fan to the appropriate header on the motherboard.
Mounting the Motherboard
Position the motherboard inside the PC case, aligning the mounting holes with the standoffs. Secure the motherboard in place using the screws provided with the case. Ensure that all connections, such as power and data cables, are accessible and properly routed.
Inserting RAM Modules
Gently insert the RAM modules into the appropriate slots on the motherboard, applying even pressure until they click into place. Refer to your motherboard manual to determine the correct slots to use for optimal performance.
Connecting Storage Drives
Connect the SATA cables from the storage drives to the motherboard, ensuring a secure connection. If you’re using an M.2 SSD, install it into the appropriate slot on the motherboard.
Installing the GPU
Carefully insert the GPU into the PCIe slot on the motherboard, ensuring it’s seated properly. Secure it using the screws provided. Connect the necessary power cables from the PSU to the GPU.
Position the power supply in the designated area in the PC case and secure it with screws. Connect the necessary power cables to the motherboard, GPU, storage drives, and other components.
Cable Management
Organize and route the cables neatly to ensure proper airflow and aesthetics. Use cable ties and routing channels provided in the case to keep the cables tidy and avoid any obstructions.
Testing Your System
Before fully closing up the PC case, double-check all connections and make sure everything is properly seated. Connect a monitor, keyboard, and mouse, and power on the system. Check if the components are recognized and functioning correctly. Install the necessary drivers and run stress tests to ensure stability and performance.
Installing and Optimizing Software
Operating System Installation
Install your preferred operating system, whether it’s Windows, macOS, or a Linux distribution. Follow the installation prompts and enter the necessary information. Ensure that all drivers are up to date and compatible with your chosen operating system.
Driver Updates
Download and install the latest drivers for your components, including the motherboard, GPU, and peripherals. These drivers optimize performance and ensure compatibility with the operating system and games.
Software Tweaks and Optimization
Fine-tune your system by adjusting settings in the operating system and graphics control panel. Optimize power settings, enable performance modes, and configure graphics options for the best gaming experience. Install software utilities for monitoring system temperature and performance, such as CPU and GPU monitoring tools.
Fine-Tuning and Overclocking
BIOS Settings
Access the BIOS settings of your motherboard and configure options such as boot priority, XMP profiles for RAM, and fan control. Consult your motherboard manual for specific instructions on accessing and navigating the BIOS.
GPU Overclocking
If you’re looking to squeeze out extra performance from your GPU, consider overclocking. Use software tools provided by the GPU manufacturer to gradually increase the clock speed and memory frequency while monitoring temperatures and stability. Be cautious and test for stability to avoid system crashes.
CPU Overclocking
For advanced users, CPU overclocking can provide a significant performance boost. Enter the BIOS and adjust settings such as the CPU multiplier and voltage to achieve higher clock speeds. However, this process requires careful monitoring and stress testing to ensure stability and prevent overheating.
Troubleshooting and Maintenance
Common Issues and Solutions
Even with careful assembly, issues may arise. Common problems include compatibility conflicts, driver conflicts, and hardware malfunctions. Troubleshoot by checking connections, updating drivers, and consulting online forums and support resources for specific issues.
Regular Maintenance Tips
To keep your gaming PC running smoothly, perform regular maintenance tasks. Clean the dust filters and internals of your PC case, ensure proper airflow, and periodically update drivers and software. Monitor temperatures and hardware performance regularly to identify any anomalies.
Enhancing Your Gaming Experience
Monitor Selection
Choose a high-quality monitor that suits your gaming preferences. Consider factors like resolution, refresh rate, response time, and panel type. Look for features such as G-Sync or FreeSync for smooth gameplay and HDR support for vibrant visuals.
Audio Setup
Invest in a good gaming headset or speakers to immerse yourself in the gaming experience. Look for options with surround sound, noise cancellation, and a comfortable fit. Consider a dedicated sound card for enhanced audio quality.
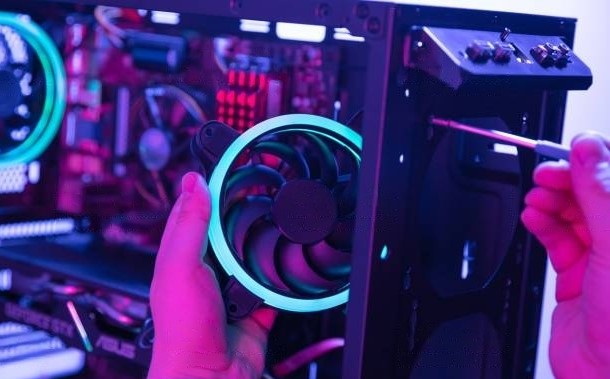
Customization and Personalization
Make your gaming PC truly yours by customizing its appearance. Add RGB lighting strips, customize the color schemes, and choose a PC case with a window panel to showcase your components. Consider cable sleeves and cable management accessories for a clean and organized look.
Future Upgrades and Expansion
Identifying Upgrade Opportunities
As technology advances, you may want to upgrade your gaming PC in the future. Consider components that offer room for expansion and future compatibility. Look for motherboards with additional PCIe slots, power supplies with higher wattage reserves, and cases with ample space for upgrades.
Compatibility Considerations
When planning future upgrades, ensure compatibility between new components and existing ones. Check compatibility with the motherboard, CPU socket, and power requirements. Research and consult manufacturer documentation or online resources for compatibility information.
Conclusion
Congratulations! You’ve successfully built your own gaming PC and embarked on an exciting journey of customization and performance. By following this comprehensive guide, you’ve learned how to select the right components, assemble your system, and optimize it for the best gaming experience. Remember to keep your PC maintained, stay updated with the latest drivers, and have fun exploring the world of PC gaming.
We use cookies on our website to give you the most relevant experience by remembering your preferences and repeat visits. By clicking “Accept”, you consent to the use of ALL the cookies.
This website uses cookies to improve your experience while you navigate through the website. Out of these, the cookies that are categorized as necessary are stored on your browser as they are essential for the working of basic functionalities of the website. We also use third-party cookies that help us analyze and understand how you use this website. These cookies will be stored in your browser only with your consent. You also have the option to opt-out of these cookies. But opting out of some of these cookies may affect your browsing experience.
Necessary cookies are absolutely essential for the website to function properly. This category only includes cookies that ensures basic functionalities and security features of the website. These cookies do not store any personal information.
Any cookies that may not be particularly necessary for the website to function and is used specifically to collect user personal data via analytics, ads, other embedded contents are termed as non-necessary cookies. It is mandatory to procure user consent prior to running these cookies on your website.